How to update Prepar3D–v4.5
Just less than a year ago, I wrote a similar tutorial when version 4.3 was released. I began that article with the words “There seems to be a lot of confusion regarding how to update Prepar3D”. While ten months may have passed, the confusion hasn’t. So as I stated before, I’m going to do my best to provide you a step-by-step guide for how to update Prepar3D. Or at the very least, how I update my own instance of Prepar3D.
About This Guide
This step-by-step guide was written specifically for the Prepar3D version 4.4 to 4.5 update and written/published in mid April of 2019. Lockheed Martin released P3D v4.5 on 9 April 2019. If you are referring to this guide anytime after version 4.5 (v4.6, v4.7 etc.) then this method should also work as well. Unfortunately my crystal ball isn’t working for peering into the future, so who knows how the update process will work for P3D v5 (if there is such a thing). What I’m trying to say here, is content on the Internet tends to live forever and you might be stumbling on this writing a year, two or more from the time I wrote it. Just keep that in mind.
The Update Process
Just a little background for those that may not be aware. I believe, starting with P3D v3.x, Lockheed Martin developed P3D to be somewhat modular in the way one can update and maintain the simulator. This modular setup consists of three main files with the first being the Client, the second being the Content and the third being the Scenery. When Lockheed Martin develops, tests and deploys an updated version to us, we no longer need to completely uninstall the entire P3D application just to take advantages of the updates. In many cases, only the “Client” portion of the update needs to be applied. But you should do your homework to best determine exactly what you need to update to take advantage of all the new bells and whistles available.
Prepar3D version 4.5 Change Log
To aid you in understanding all the changes included in the P3D v4.5 update, please follow this link. Use this information to determine what you want to update.
My Update Process
As I do each and every time a new P3D update is released by Lockheed Martin, I study the change log to determine my action plan. As was the case with the version 4.4 update, I personally am not interested in the updates which have been made to the Content and the Scenery. So this update will be super simple for me, as I’ll only be updating the Client portion. If you desire to update either the Content and/or the Scenery…then go ahead and do so.
Step One
Make note of P3D Settings. Before I perform an update, I typically will start up P3D and take screen captures of all the settings screens. This way, if anything gets changed during the update process…I’ll be able to quickly reset everything back to the way it was before. I like to run P3D with the updated version with the same settings I ran on the previous version first, before tweaking anything. This way I have a better determination on just what improvements were made and how these improvements impact my setup.
Step Two
Download the update files required. As I previously mentioned, I’m only planning to update the Client for v4.5. You’ll need to login to the downloads section of the Prepar3D website with your license or account credentials. Once there, click to expand the individual component downloads section and download the following file: Install_Client.msi. Once downloaded, I typically place all the files into a new folder I create on the Windows desktop for ease of access.

As a side note, if you were interested in updating the Content, you would also need to download the Install_Content.msi along with BOTH the cont1.cab and cont2.cab files. Same would apply for Scenery. You would need to download the Install_Scenery.msi along with all seven of the sceneX.cab files.
If you are planning to update Content and/or Scenery, then just place the .cab files in the same location as you’ve downloaded the Install_Content.msi and/or Install_Scenery.msi files. When you go to run the install on the content/scenery the .msi files will automatically access the .cab files during the process.
Step Three
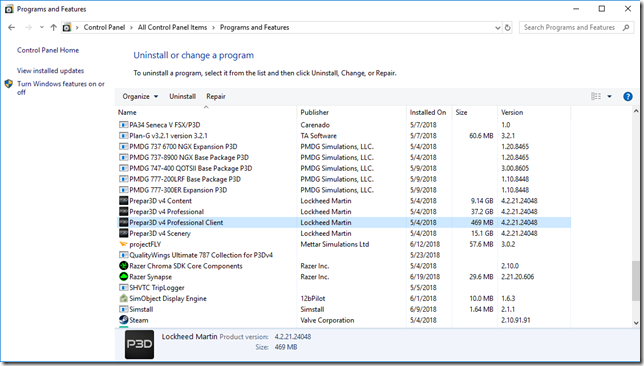
This is a really important step to focus on. Regardless of your overall plan, you want to uninstall one component at a time. I’ve found this to be the least error prone way of performing an update. On your Windows gaming PC, go to Control Panel > Programs and Features. From here we’re going to uninstall the P3D CLIENT ONLY.
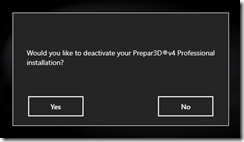
When prompted “Would you like to deactivate your P3D installation?”, Click NO!
Step Four
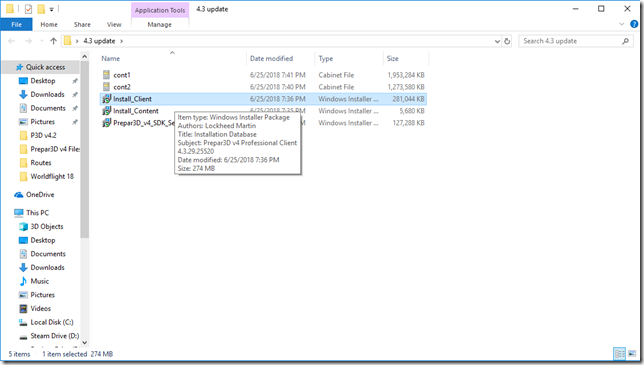
Next, we’re going to install the updated P3D Client which we downloaded in step two. As previously mentioned, after I download all the appropriate files, I create a folder on my Windows desktop and place all the downloaded files in that folder. Right-click on the Install_Client file and select Install.
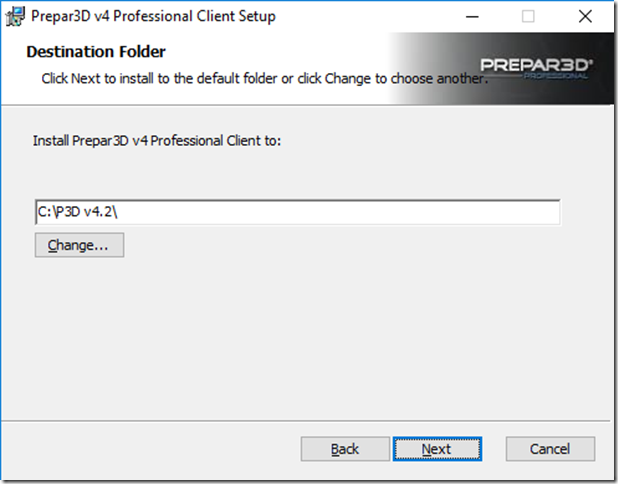
Pay very special attention during the install to make sure the updated client is being installed in your specified P3D install directory. In my example, everything defaulted in just as it should have.
If you are planning to update the Content and/or the Scenery parts of Prepar3d, then return to step three and repeat the process but this time uninstall Content, then install Content and finally uninstall Scenery and then install Scenery.
Step Five
Pending everything installed successfully, reboot your PC. While the P3D update/install files will not prompt you or even require you to reboot, it is ALWAYS in your best interest to reboot after installing software and we’re wanting a trouble-free upgrade…so just reboot! Trust me, I’m an IT Guy!
Step Six
Once your Windows gaming PC has successfully restarted, launch P3D. Don’t be alarmed if P3D takes a little longer than normal to launch the first time. P3D is doing a lot of work behind the scenes and in my experience it took perhaps an additional 1-2 minutes than normal.
Step Seven
Hopefully your update was successful. Congratulations! Pat yourself on the back as you’ve just successfully updated P3D. At this point, I close out of P3D as I still needed to perform a few other updates to software accessories such as ActiveSky, Envtex, FSLabs Airbus etc.
Note: If you use Orbx Global Textures, you most likely will need to perform a Force Migration after performing an update. This is a very simple and quick process to complete. Just launch the FTX Central application. Go to Settings then look for Force Migration.
The End Result
Upon completing the client update for P3D version 4.5, I’m experiencing absolutely nothing but positive results. The P3D load time has slightly improved and I’m not seeing any noticeable performance degradation. From everything that I’ve seen, P3D v4.5 is absolutely fantastic and the enhanced night lighting actually has me wanting to fly more at night which I rarely would do in the past.
Benefits to Updating?
I’ve recently written and published an article I’ve titled “Prepar3D – To Update or Not To Update” which I discuss the benefits and also some of the concerns to updating P3D. Only you can decide if the benefits outweigh the risks. Of course, there’s also nothing wrong with waiting a few weeks until more of the add-ons have been updated for the newest version. What ever direction you decide to go, best of luck to you.
Until next time…
Happy Flying!!!
Jerry

Raymond Hammer
August 21, 2019 - 5:17 pm
Jerry, I have never seen a more well written and comprehensive narrative about anything Flight Simulator. THIS is called communication. Thank you so much.
GrizzlyBearSims
August 21, 2019 - 5:52 pm
Thank you for the kind words.
Snoopy41
October 24, 2020 - 10:44 pm
Followed the article, perfect results, agree its down to earth, detailed, correct, should be a must for all the P3D V4 community.